
Getting started with FStorm render
FStorm is the latest GPU render engine on the market. Available as a final release since last december, it was already available for production on our GPU Farm during its beta testing phase.
Getting started
Once you have downloaded the demo version or bought your license (20 euros/month), you’ll get your activation codes on the FStorm website. Activation works directly within 3dsmax without any noticeable problem.
Be careful, FStorm is checking your activation every other day, so you do need to have an active internet connection on your PC.
Kernel settings
One starts by having a look at the kernel settings.
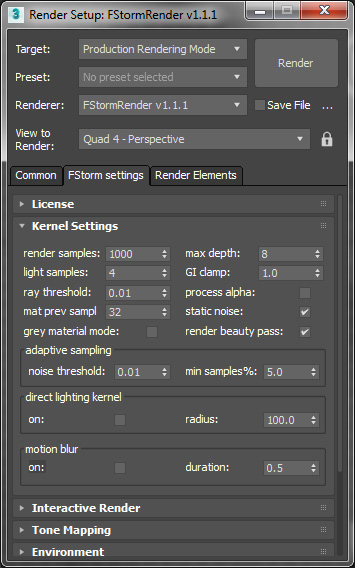
One finds there the standard render samples – the maximum number of samples for the scene and the max depth (maximum number of ray bouncing) too.
We also have the adaptive sampling parameters which allow to target the noisiest parts to be dealt with in priority and the clamping of the global illumination which fixes fireflies problems.
Adaptive sampling
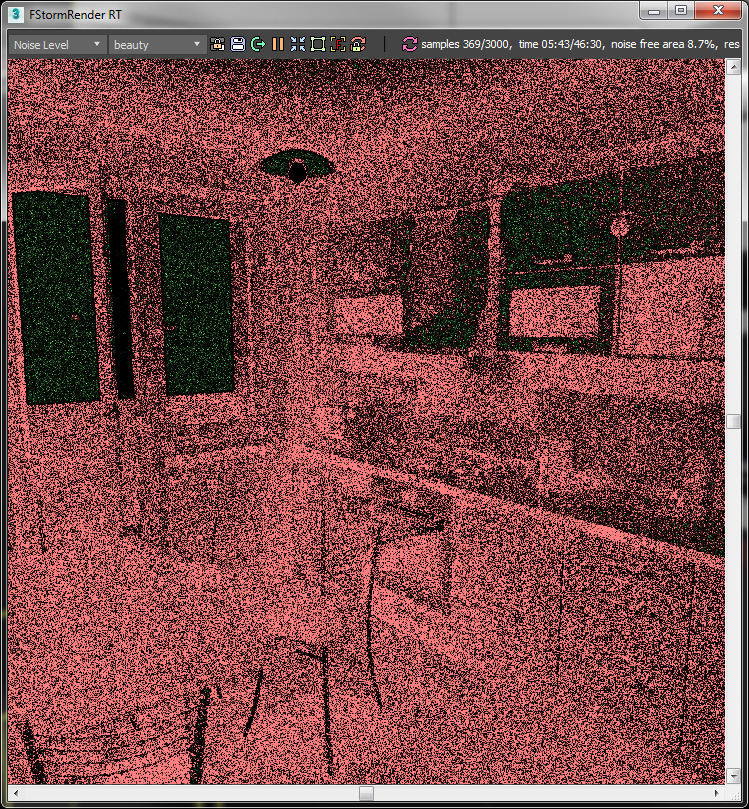
Adaptive sampling is no doubt the key point here. It defines the level of noise to /reach/be reached.
A very useful tool in the interactive render that allows us to visualize the scattering of the noise in the image. This tool, compatible with the render region, allows to quickly set the adaptive sampling.
It’s a kind of “remaining noise” radar.
Grey Material Mode
A “grey material mode” applies a uniform grey shader to all the non luminous objects to create a clay render.
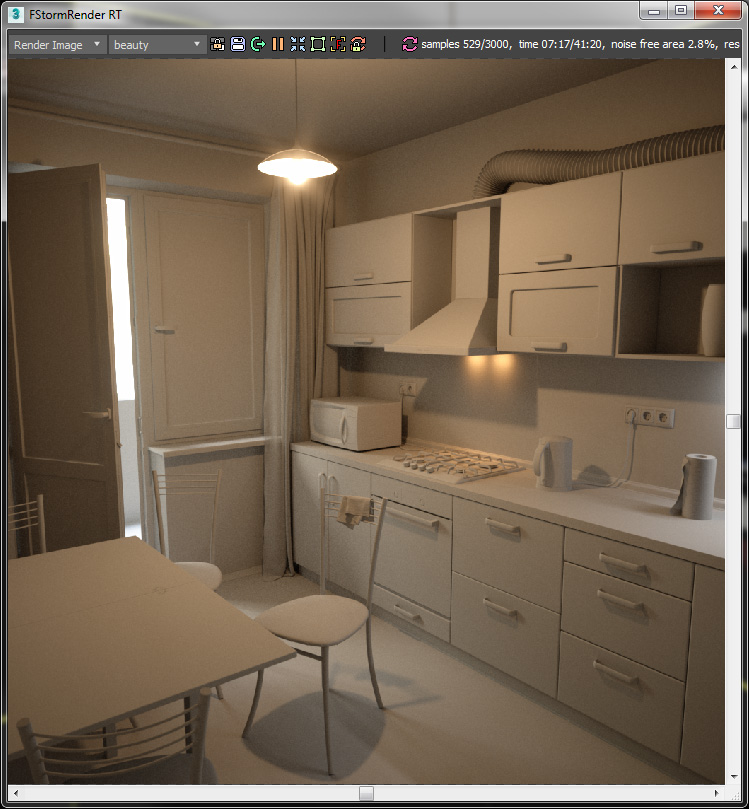
Interactive Render
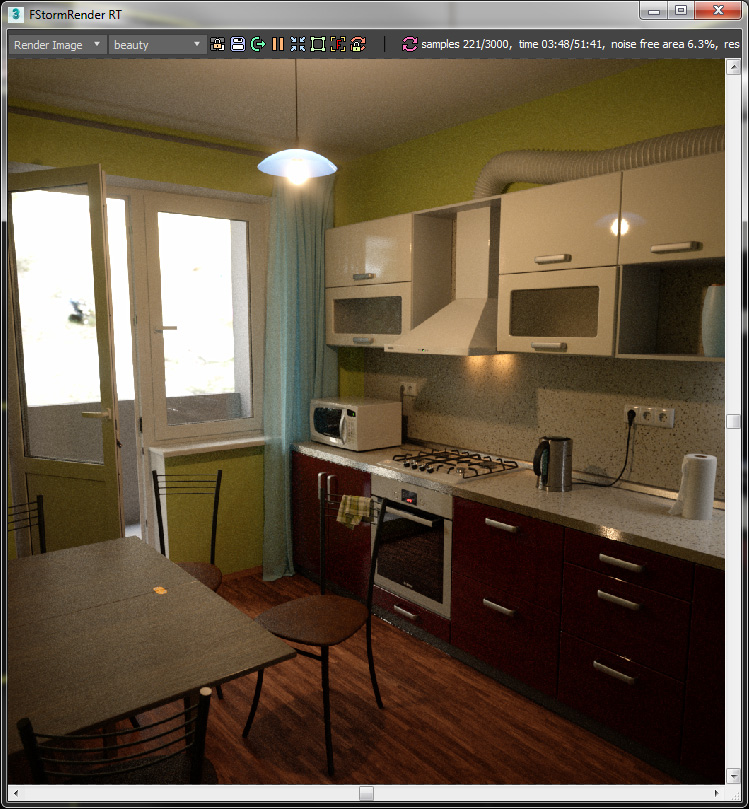
In the Interactive Render part, you can run the interactive rendering mode by clicking on RT mode.
The Interactive Render part has a render region and allows us to visualize the render elements (ambient occlusion, material_id…)
In the Tone Mapping menu, one can load the Look-Up Table (LUT) and visualize the results directly inside the interactive render window.
Environment
FStorm does not operate the environment parameters of 3dsmax. It has got a dedicated part to create its own environment.
Please note that the environment map needs to be loaded by using the FStorm Bitmap node.
We can also use the FStorm Sky coupled to a FStorm Sunlight to create the sky and the sun.
Cameras
In the camera and glare parts we will find general parameters for the Depth of Field and the dazzling effect that will be applied to all the cameras in the scene.
If we create FStorm cameras within the scene we can override the general parameters, making the camera independent to control tone mapping, depth of field and glare.
Scene Converter
The last interesting part is Tools with, especially, the “scene converter” tool which allows Vray, Corona, Octane and scanline scenes conversions to FStorm format.
Conversion from Vray models works well, maps are well relinked and global appearance is preserved.
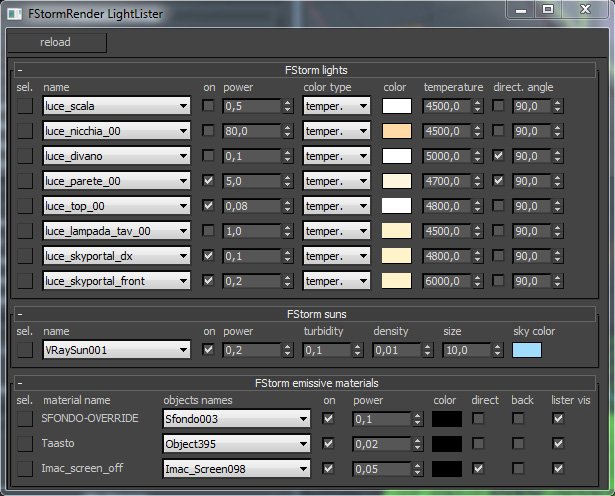
Light lister displays a window with all the lighting sources of the scene for a quick and easy set-up, thanks to interactive render.
What about the shaders?

Nothing revolutionary for users who will feel quickly at ease here. The magic is done under the hood.
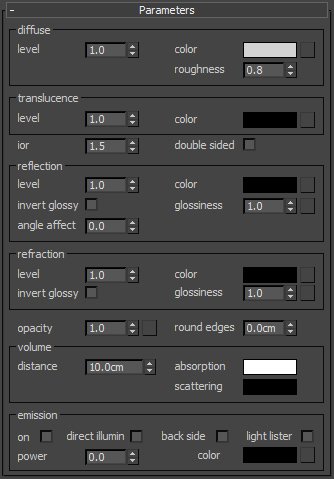
Shader creation is a mix between distribution, reflection and refraction parts.
Volume parameters allow to tint the transparency depending on the thickness and to create SSS effects.
A translucence part will handle materials like curtains or paper sheets (single surface SSS).
Round edges, an always appreciated feature, allows us to break the over pronounced edges of our models. It is available for each material.
A FStorm mix material allows us to blend two FStorm materials together.
Last point: a FStorm Portal to be put in front of windows or other light sources to help the render engine indicate the different light entrances/inputs inside a room.
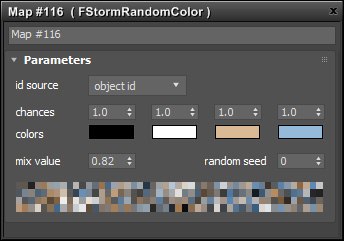
FStorm does not support native 3dsmax procedurals. FStorm has its own procedurals : FStormNoise, FStormGradient, FStormFallOff and the very useful FStormRandomColor which affects random colors to a set of objects.
Do not forget the FStormDirt to soil models. The fundamentals are here.
Displacement is in on this too. It’s a 3dsmax modifier to which we connect a FStormBitmap with its displacement map. It works without any bad surprise.
Conclusion
Despite its young age, FStorm already has got most of its big brothers features: SSS, displacement, rounded edges, dirt maps…
Available on 3dsmax, it offers one of the fastest photorealistic renderers.
The Scene Conversion tool allows to import libraries of objects with few adaptation efforts.
This first release is ready for production.
GPU render on RANCH Computing
Our GPUFarm reaches an OctaneBench of 730 per server and can render Octane Render, Vray RT, Thea Render and FStorm Render projects.
With the speed of these renderers and an hourly rate of 1.1 cts/Ghz.h, this is an unbeatable solution to create your images.
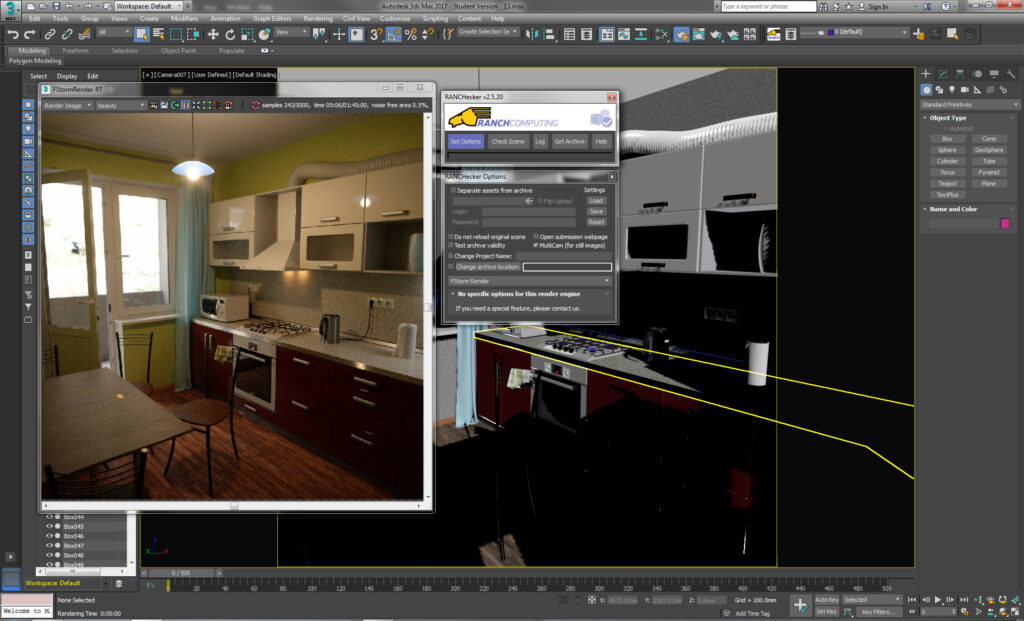
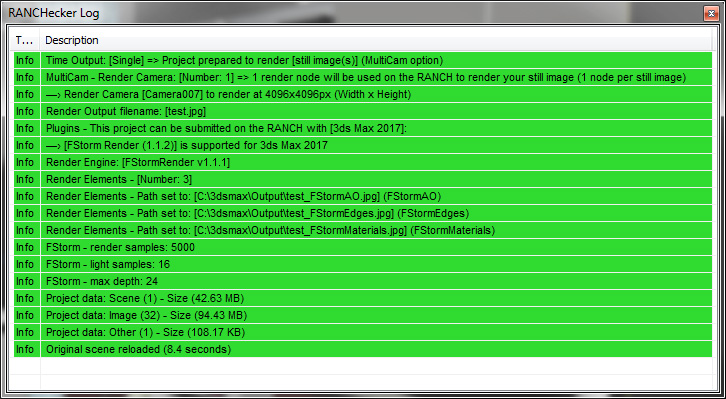
Thanks to the RANCHecker tool, I have been able to check the validity of my 3dsmax/FStorm scene. RANCHecker has then created an archive ready to be uploaded to the GPUFarm.
Rendering with RANCH
Finally : 4096×4096 pixels image for 8 euros.
Project time: 01 h 02 mn 22 s.
Render: 758.59 GHz-H (100.0%)
Total GHz-H charged: 758.59 (8.34 euros – GPU)
Volume of data to download: 7.69 MB.
For more benchmarks, please take a look at our other blog post.
Ressources
Software download: https://fstormrender.ru/download/
Facebook group: https://www.facebook.com/groups/FStormGroup/
Demos scenes: https://fstormrender.ru/forum/forum/free-resources/scenes/4842-free-fstorm-scenes